I have an AWS account and signed-in as the Admin account for my environment
I have two documents ‘photo.gif’ and ‘timer.html’. The .html is a static webpage that I developed using javascript, html, and css. photo.gif is a file referenced in the timer.html file.
Creating a S3 Bucket
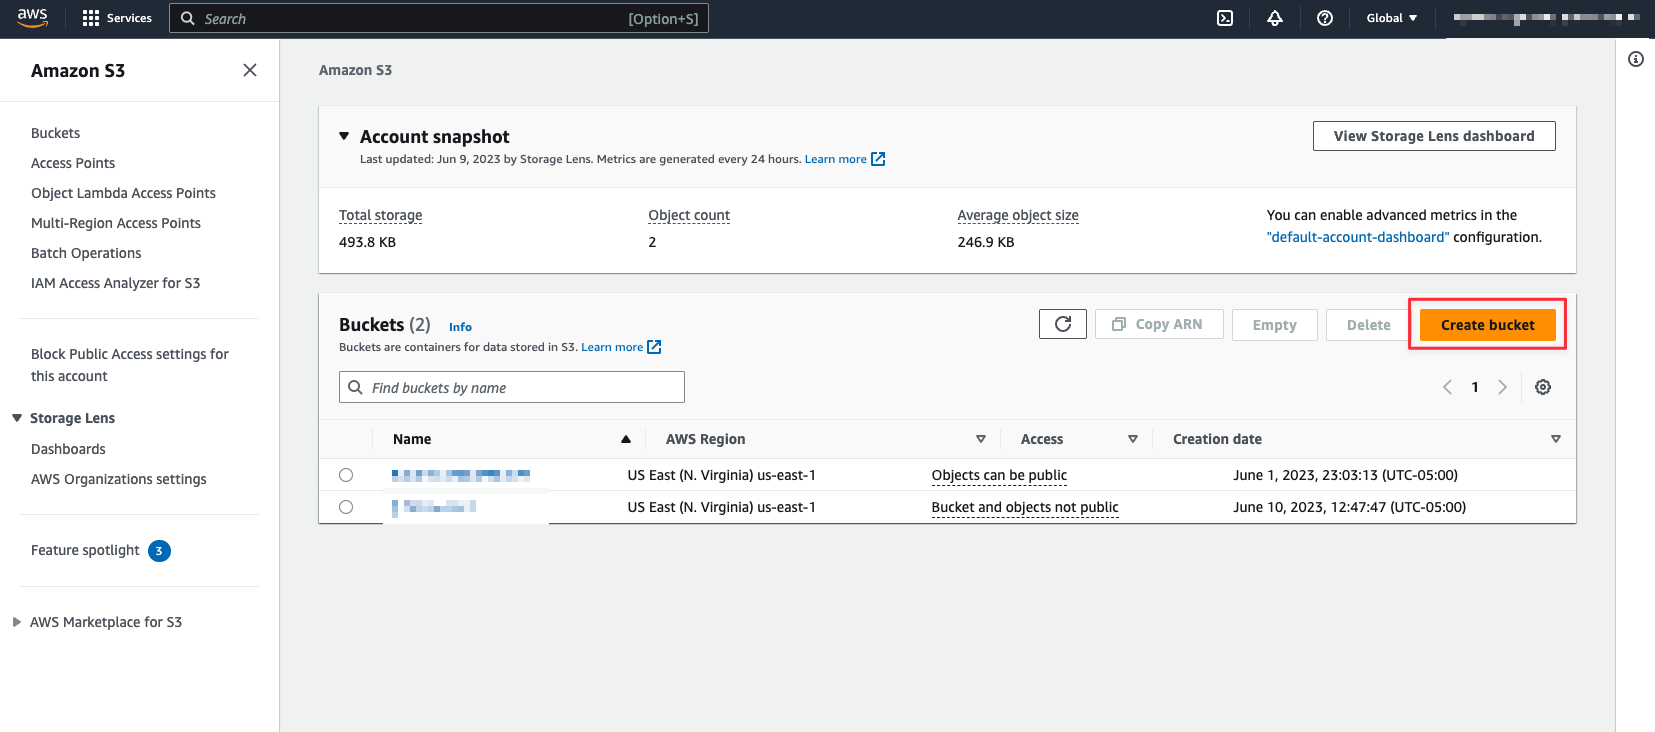
In the Amazon Console search for ‘S3’ and click on the S3 service
In S3 you are going to create a bucket
You can name this bucket whatever you would like for your project, keeping in mind that it will be visible in the URL of the webpages you will be adding to this bucket
Take note that the AWS Region you choose will be different depending on which region is best/affordable for your specific use case
Keep all other options in the default configuration and scroll down to the ‘Create bucket’ button
Adding files to your Bucket
Now that you have a bucket created, you can now find that bucket in Amazon S3
Open your bucket and here you will be able to add objects (files) to your bucket
I have added the two example files named ‘photo.gif’ and ‘timer.html’ to my bucket. The timer.html is a simple page that uses javascript, html, and css to create a page that has a countdown to Halloween. The timer has a moving background (photo.gif) that is referenced and must also be publicly accessible.
Setting Bucket Permission
Now that you have your Bucket created and files needed now uploaded, we can begin assigning the correct permissions
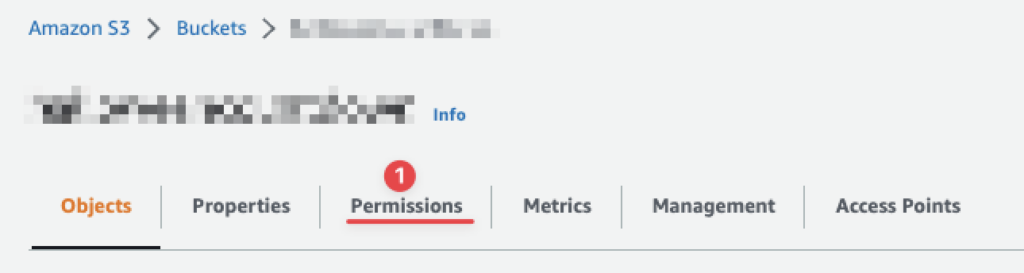
When you are in your bucket and see the uploaded files, click on the ‘Permissions’ tab next to ‘Objects’
After clicking on the Permissions tab, you will be brought to the Permission page. On that page you will see the Bucket Policy field
Edit the bucket Policy and add the following JSON policy statement:
This JSON policy statement allows all outside users access to this bucket. Remember, we still need to assign the appropriate permissions for the actual files inside your bucket as those all have individual access rights
Setting Object Permission
Now that we have our Bucket wide policy set, we need to now allow access to our individual files that we uploaded earlier
Navigate to each file located inside your bucket and click on its Permissions where you can edit the Access Control List (ACL)
Now at the Edit access control list page, you can add Read access to the Everyone group and Save your changes
Accessing your Webpage
You know have your Object’s URL publicly routable via the internet
You can copy this URL to now see your webpage
Take note, this is an example implementation. If you are expecting many visitors on this page, remember that AWS charges for reading data from your bucket. An option can be to utilize CloudFront, AWS’s content delivery network (CDN). By setting up CloudFront, you can benefit from improved performance, reduced latency, and enhanced scalability for delivering your static website content globally. CloudFront caches your site’s assets at edge locations worldwide, reducing the load on your S3 bucket and mitigating the costs associated with high traffic. Additionally, CloudFront offers features like SSL/TLS support, custom domain names, and fine-grained caching controls, providing a more robust and secure delivery mechanism for your static site.